

Decide who the channel is for, what they want to achieve, and which gap you can fill better than what's already on YouTube. That focus gives every video a clear purpose.
Clear audio, steady footage, and an uncluttered space beat expensive gear. Choose a publishing schedule you can keep alongside your timetable, then let viewer feedback shape what you film next.
Promote videos through the channels your members already use, and decide what stays free and what's for paying members. With bsport, you can organize YouTube videos into an on-demand library and include it in a membership or sell it separately.
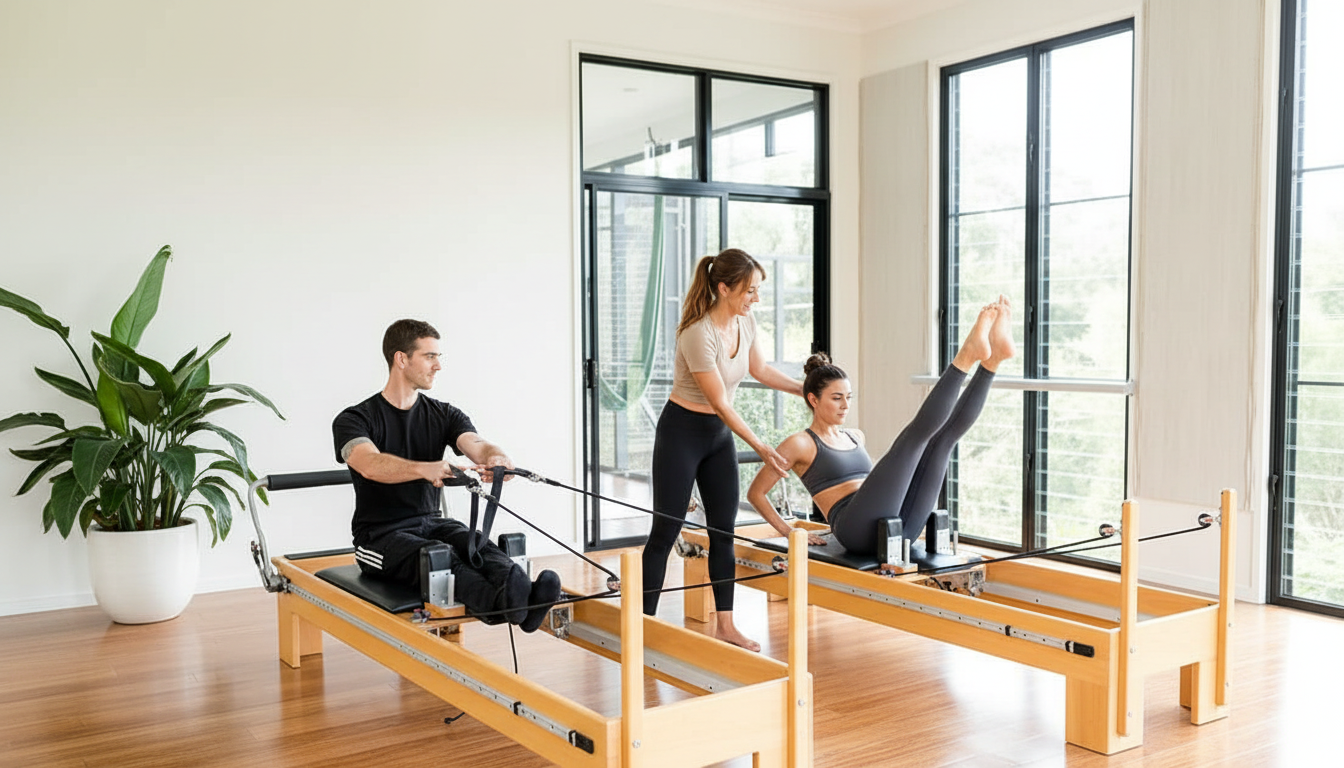
For boutique fitness studios, YouTube can extend the class experience beyond the timetable. It gives prospective members a way to understand your teaching style and helps existing members stay connected between visits.
The challenge is turning that into a channel you can manage consistently. You're already balancing programming, instructors, member communication, and daily operations, so an unclear content plan or a complicated production process can make it hard to keep going.
This guide explains how to start a fitness YouTube channel in five steps, from branding to building a community. Whether you teach Pilates, strength training, high-intensity interval training (HIIT), mobility, yoga, or several disciplines, you'll learn how to build the channel around the experience your studio already delivers.
Step 1: Set up and brand your fitness YouTube channel
Start with what viewers notice first: the channel name, description, and visual identity.
Create your channel
Sign in to your Google account, go to YouTube, and create a new channel that reflects your studio brand. Then fill in the basics:
- Channel name: clear, brand-consistent, and searchable. A studio called Lotus Flow Yoga could use Lotus Flow Online. A Pilates or strength studio might choose Reform at Home or Northside Strength Sessions. The goal is to stay recognizable to your existing members.
- Channel description: who you are, what you teach, and what viewers get from subscribing. Lead with the most important information, since viewers may only see a shortened preview. For example: "I'm Hanna, founder of Northside Movement Studio. On this channel, you'll find Pilates classes, strength sessions, mobility tutorials, and guided recovery practices. Subscribe to keep moving with us between studio visits."
Pro tip: add keywords that match your classes, such as Pilates for beginners, 20-minute HIIT workout, yoga for flexibility, or morning mobility. It makes your channel easier to find.
Design your channel branding
- Logo: use your studio logo if people already recognize it. If not, design one that reflects your channel's name and approach
- Profile picture: your logo, or a professional photo of you and your team
- Banner: a high-quality image of you teaching in your studio, with your upload schedule (e.g. "New classes every Monday and Thursday")
- Color palette and visual style: keep colors, fonts, and imagery consistent with your studio's look
Earthy tones may suit yoga and mindfulness, while neutral, minimal palettes can work for Pilates or mobility-focused studios. Brighter colors such as red, black, and yellow may fit HIIT, strength training, or indoor cycling better.
Step 2: Define your audience, niche, and content style
Before planning individual videos, decide who the channel is for and how your teaching will meet their needs.
Choose the fitness audience and niche you want to serve
A beginner looking for low-impact movement needs different guidance from an experienced athlete training for performance. Your viewers might include older adults, busy professionals, postpartum clients, or existing members who want support between classes.
Ask yourself:
- What goal do they want to reach, such as strength, mobility, weight loss, stress reduction, or sport performance?
- How much space do they have?
- What equipment can they access, such as weights, resistance bands, a Pilates reformer, or an indoor bike?
- Which disciplines, populations, and teaching methods are you qualified and confident to lead?
Use the answers to choose a niche that's specific enough to stand out and broad enough to support an ongoing content plan. At-home Pilates for busy professionals, mobility for strength athletes, or low-impact fitness for older adults each gives the channel a clear focus without limiting it to one topic.
Then search YouTube for the topics you're considering. Look for unanswered questions, outdated guidance, unclear instruction, missing modifications, or no logical progression between videos. Focus on the gaps that match your expertise and the questions you already hear in your studio.
Identify your teaching style and video formats
Your style and tone help viewers know what to expect. Think about:
- Which disciplines you'll focus on, such as Pilates, strength training, HIIT, mobility, indoor cycling, Vinyasa, or Yin
- Your teaching tone: motivational, nurturing, calming, or strong
- How you want viewers to feel after each class: energized, grounded, supported, or confident
Then plan formats that fit your brand and audience, rather than posting random classes:
- Full-length class recordings from your studio
- Short tutorials breaking down specific movements (e.g. "Crow Pose in 5 Minutes," "How to Set Up a Pilates Reformer," or "Kettlebell Deadlift Basics")
- Themed playlists, such as Morning Mobility, Beginner Pilates, or a 30-Day Strength Series
- Guided meditation and recovery sessions
- Yoga flows, Pilates sequences, or strength circuits, with or without music
- Sessions co-taught with another instructor or a guest coach
Use popular formats when they suit your teaching, but start from the gaps you found and the questions your members ask. Keep every video within your instructors' qualifications, especially for postpartum movement or rehabilitation, and offer clear modifications. Since you can't assess viewers in person, remind them to work within their abilities.
Step 3: Prepare your filming space and equipment
Your setup should make it easy for instructors to be seen and heard clearly, without an expensive production.
Dedicated filming space
Choose a quiet, bright corner with enough room to move comfortably. Add a few details members will recognize, such as your usual equipment or your studio logo, and keep the background uncluttered so viewers can focus on the instruction.
Before recording, get consent from anyone who'll appear on camera and follow the privacy rules that apply where you are. Frame each shot so you don't capture members who haven't agreed to be filmed.
Essential equipment
Prioritize clear sound. A simple setup with reliable audio works better than cinematic visuals with echoey audio or background noise. To get clear audio and video without spending a fortune, use:
- A camera or smartphone that records in high definition (HD)
- A tripod for stable angles
- A microphone, such as a clip-on lavalier mic, especially for spoken tutorials
- Lighting: natural light near windows, or softbox lights in darker spaces
Step 4: Edit and publish your videos
A simple editing and publishing process helps viewers follow your videos and keeps them coming back for new ones.
Edit for a clear viewing experience
Start by cutting setup time and anything else unnecessary at the beginning or end. Open with a warm greeting, then show the class title and channel name.
If you add royalty-free music, keep it low enough that viewers can hear every cue. Choose calm music for yoga, Pilates, mobility, or meditation, and something more energetic for HIIT, cycling, or strength workouts.
End with an outro that tells viewers what to do next, like subscribing or trying a related workout.
Recommended editing tools
You don't need advanced editing skills to start:
- iMovie (Mac) or Clipchamp (Windows) for basic edits and text overlays
- Canva or CapCut for editing on your phone with ready-made templates
- Final Cut Pro or Adobe Premiere Pro for more control over picture and sound as your channel grows
Prepare each video for publishing
Before uploading, write a clear title and a detailed description using the words viewers are likely to search for. Choose a thumbnail that clearly shows the exercise, studio, or instructor. Then add each video to a relevant playlist so viewers can easily find the next class or a related tutorial.
Step 5: Build community and connect your channel to your studio
Once your videos are live, a manageable schedule and viewer feedback help you build an active community.
Set a sustainable publishing schedule
Choose a schedule you can keep alongside your studio timetable, such as every Wednesday or Sunday. A predictable rhythm lets viewers know when to expect the next video.
Use viewer feedback to shape future videos
Use comments, member requests, and YouTube analytics to understand what viewers need next. Ask yourself:
- What questions or challenges come up repeatedly?
- Which classes or tutorials are viewers asking for?
- Which videos hold attention or get the most engagement?
Replying to comments turns each video into a conversation. Thank people for compliments, and be open to discussing an exercise or technique in more detail. You can also ask questions in your videos and captions, like: "Would you like a calming Yin flow, a Pilates core session, or a beginner strength circuit next week? Let me know in the comments." It shows viewers their questions matter and gives them a reason to come back.
Promote your videos through social media and email
Don't rely on YouTube alone. Share short clips on Instagram Stories or Reels with a link to the full video, and share relevant videos in Pilates, strength, HIIT, yoga, mobility, or wellness communities.
Include new videos in your studio newsletter too. With bsport's marketing tools, you can send them by email or push notification to the member groups most likely to watch, such as beginners or members who prefer a particular class type.
Offer videos as paid content or membership benefits
bsport's fitness studio management software integrates with YouTube, so members can watch your classes on your website between studio visits. You can organize videos into an on-demand library, then include it in a membership or sell it separately.
For more ideas, see how live streaming and video on demand can support your studio.
Start your fitness YouTube channel
A fitness YouTube channel gives your studio's teaching a home online and helps members stay connected between visits, whether you teach Pilates, strength training, HIIT, mobility, yoga, or a mix.
Once you have a steady rhythm for filming and publishing, let viewer feedback decide what you make next. Over time, the channel can bring your classes to a much wider audience.
Take full control of your digital and in-person experience. Explore how bsport's fitness studio software helps you manage members, run an on-demand video library, and grow your studio.


FAQ Key things to know
How much does it cost to start a fitness YouTube channel?
You can start with little or no extra spending if you already have a smartphone, a suitable studio space, and basic editing software. Spend first on equipment that solves a clear problem, like a tripod for stability or an external microphone for clearer instruction.

How long should a fitness YouTube video be?
No single length works for every channel. Match the length to the purpose: keep tutorials focused, give full classes enough time to run safely, and use audience-retention data to see where viewers drop off.
Can I use popular music in fitness YouTube videos?
Avoid popular music unless you have the rights or a license that covers publishing on YouTube. To reduce the risk of copyright claims, choose tracks from the YouTube Audio Library or another source whose terms allow YouTube use and monetization.